Mini split systems have become increasingly popular for their efficiency and flexibility in providing heating and cooling solutions. These systems are suitable for both residential and commercial HVAC services. They offer the advantage of being ductless, which makes them a great option for buildings without existing ductwork. Our professionals specialize in the installation of mini split systems, ensuring you get the best performance and longevity from your investment.
Understanding Mini Split Systems
Components and Functionality
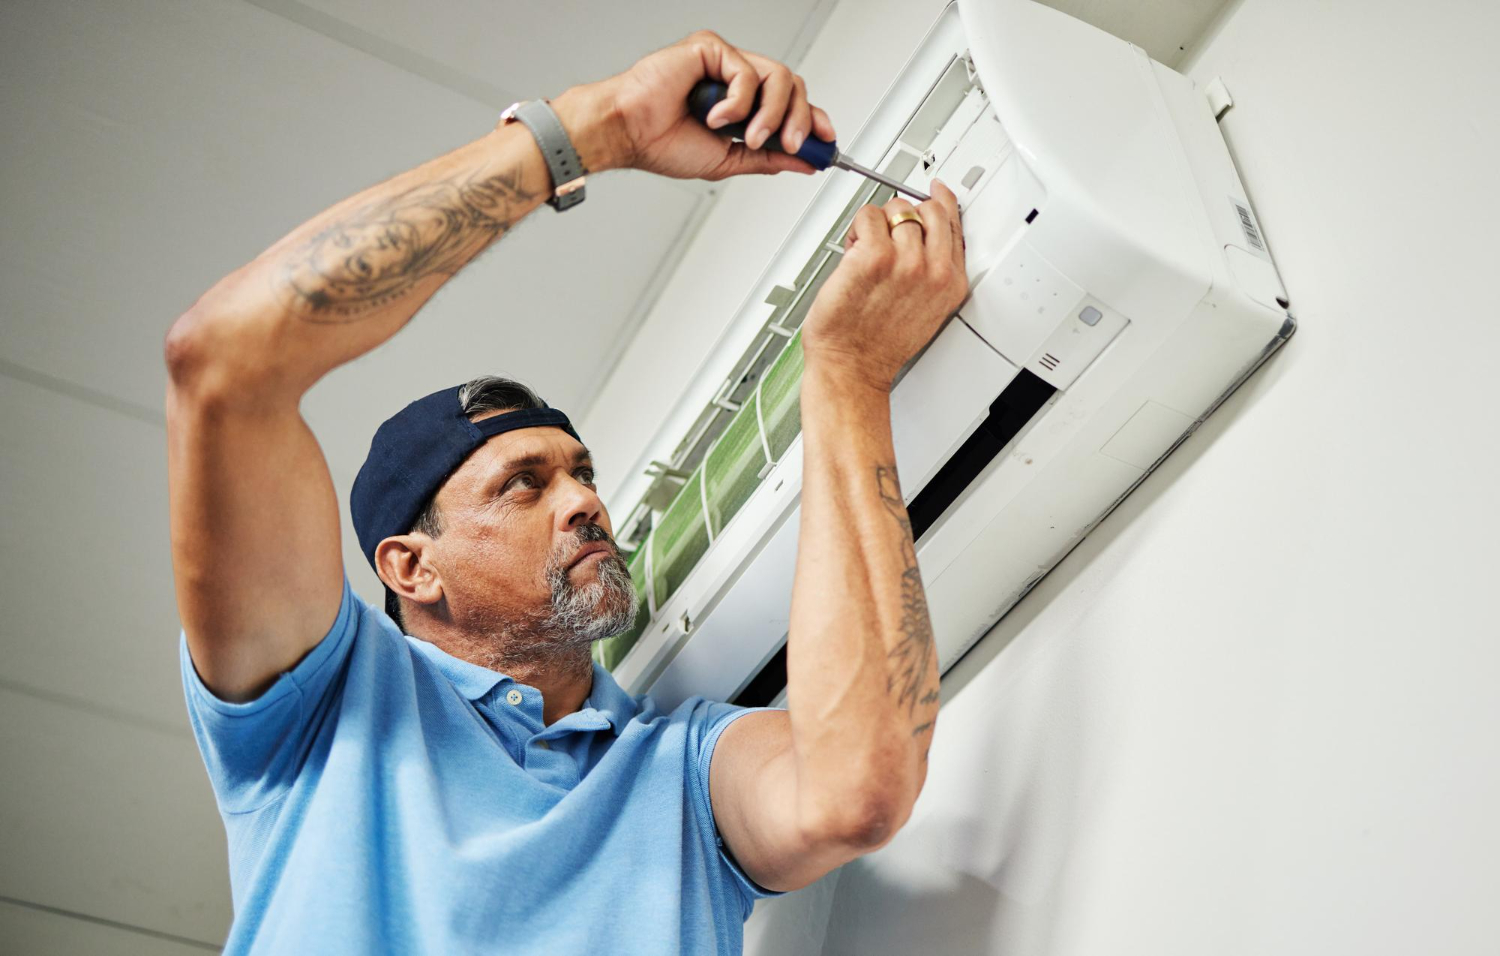
A mini split system consists of two main components: the indoor unit and the outdoor unit. The indoor unit is typically mounted on a wall and is responsible for cooling and heating the indoor air. It contains the evaporator coil and a fan that circulates the air within the room. The outdoor unit, which is installed outside the building, includes the compressor, condenser coil, and a fan that expels heat absorbed from the interior.
The two units are connected by refrigerant lines that carry the refrigerant between the indoor and outdoor components. This allows the system to transfer heat from inside the building to the outside, or vice versa, depending on the heating or cooling mode. Mini split systems also come with a remote control for easy operation and temperature adjustments.
Advantages of Mini Split Systems
Mini split systems offer several benefits that make them an attractive option for both residential and commercial HVAC service. One of the main advantages is their energy efficiency. Because they provide zoned heating and cooling, you can control the temperature in individual rooms or areas, reducing energy waste. The absence of ductwork also minimizes energy losses associated with traditional HVAC systems.
Another benefit is the flexibility of installation. Mini split systems are ideal for spaces where installing ductwork is challenging, such as older buildings or rooms with unique layouts. They operate quietly, improving comfort without adding noise. Additionally, mini split systems provide easy maintenance due to their simple design, which means routine checks and minor fixes can be performed without major disruption.
The Pre-Installation Process
Initial Site Assessment
The first step in the pre-installation process is conducting an initial site assessment. Our technicians visit your location to inspect the area where the mini split system will be installed. They evaluate factors such as room size, insulation quality, and existing electrical infrastructure. This assessment helps in determining the most suitable mini split system for your needs and ensures that the installation will be seamless.
During the assessment, our professionals also look for any potential obstacles that might affect the installation process. This includes checking for adequate wall space and ensuring there are no structural impediments that could interfere with the system’s placement or functionality. Proper assessment guarantees a tailored solution that meets your specific requirements.
Selecting the Right Location
Choosing the right location is critical for the optimal performance of a mini split system. Our technicians help you select the best spot for both the indoor and outdoor units. For the indoor unit, they ensure it is placed where it can evenly distribute air throughout the room. Common locations include high on a wall, but placement can vary based on the room’s layout and furniture positioning.
The outdoor unit should be installed in a location that is easily accessible for maintenance but also protected from extreme weather conditions. It needs sufficient clearance from walls, obstacles, and potential sources of debris. Proper placement of both units is essential to ensure efficient operation and ease of maintenance.
Preparing Necessary Equipment
Before the installation begins, our technicians make sure that all necessary equipment and materials are prepared. This includes gathering the appropriate tools, securing the mini split system components, and ensuring that the refrigerant lines and electrical wiring are ready for installation. Preparing the equipment ahead of time streamlines the installation process and minimizes disruptions.
Our professionals also take the time to verify that all components are in good condition and compatible with your existing infrastructure. This preparation phase helps in avoiding potential issues that could arise during the actual installation. Having everything ready ensures a smooth and efficient installation process, allowing the system to be up and running quickly.
Step-by-Step Installation Guide
Mounting the Indoor Unit
The first step in the installation process is mounting the indoor unit. Our technicians start by securely attaching a mounting plate to the wall where the indoor unit will be placed. The plate needs to be level to ensure proper alignment. Once the mounting plate is secure, the indoor unit is carefully hung onto the plate. This allows the unit to be stable and ensures optimal air distribution within the room.
Next, our professionals drill a hole through the wall for the refrigerant lines, electrical wiring, and drain pipe. This hole needs to be accurate to maintain the integrity of the installation and to avoid any leaks. The lines and wiring are then passed through this hole to connect to the outdoor unit.
Installing the Outdoor Unit
The outdoor unit is the next component to be installed. Our technicians select a suitable location outside the building, ensuring it is on a flat surface and has adequate clearance for airflow. The unit is set on a concrete pad or mounted on a wall bracket for stability. This placement helps prevent vibrations and ensures the unit operates efficiently.
The outdoor unit is then connected to the refrigerant lines, and electrical wiring is passed through from the indoor unit. Our professionals ensure all connections are secure and properly insulated to prevent any potential leaks or electrical issues. The drain pipe is also connected to allow for proper condensation drainage.
Connecting the Refrigerant Lines
The final step in the installation process is connecting the refrigerant lines. Our technicians carefully connect the lines between the indoor and outdoor units, ensuring that the connections are tight and leak-free. They also vacuum the lines to remove any air and moisture, which is essential for the system’s efficiency and longevity.
Once the refrigerant lines are connected and vacuumed, refrigerant is added to the system. Our professionals then double-check all connections and fine-tune the refrigerant levels to ensure optimal performance. This thorough process guarantees that the mini split system operates smoothly and efficiently right from the start.
Post-Installation Checks and Maintenance
System Testing and Performance Checks
After the installation is complete, our professionals conduct a series of system tests and performance checks. They start by turning on the system and verifying that both the indoor and outdoor units are functioning correctly. Our technicians check for proper airflow, temperature control, and overall system responsiveness. They also listen for any unusual noises that might indicate a problem.
Next, our team uses specialized equipment to ensure that there are no refrigerant leaks and that the system pressures are within the recommended range. These checks confirm that the mini split system is operating efficiently and safely. Any adjustments needed are made immediately to optimize performance.
Routine Maintenance Tips
Routine maintenance is essential for keeping your mini split system in top condition. Our professionals recommend regular cleaning of the indoor unit’s filters. Dirty filters can reduce airflow and efficiency, so cleaning or replacing them every few months is important. The outdoor unit should also be kept clear of debris, such as leaves and dirt, to ensure proper airflow and function.
Periodic checks of the refrigerant lines and electrical connections are also recommended. Inspecting these components regularly helps identify potential issues early before they become major problems. Scheduling annual professional maintenance checks can further extend the lifespan of your system and ensure it runs efficiently year-round.
Conclusion
Installing a mini split system is a detailed process that requires careful planning, skilled execution, and ongoing maintenance. From assessing your space to the final performance checks, every step ensures that the system operates efficiently and reliably. Mini split systems offer numerous benefits, including energy efficiency and flexible installation options, making them an excellent choice for various applications.
Regular maintenance and monitoring are crucial to keeping your mini split system in optimal condition. By taking the necessary steps before, during, and after installation, you can ensure your system runs smoothly and provides comfort for years to come. Trust our professionals at All Seasons HVAC LLC to handle your mini split installation in Des Moines with precision and expertise. Contact us today to schedule your installation and ensure your HVAC needs are met with top-notch service.


